
Dinner time at our house is often a lively orchestra of requests, sometimes competing, sometimes surprisingly harmonious.
With three kids, a busy schedule, and my firm belief that food truly is love, I’m always on the hunt for meals that are not only simple and nourishing but also bring genuine smiles to everyone’s faces. One dish consistently hits that sweet spot, silencing the “I don’t like that!” complaints and replacing them with happy munching sounds: my homemade Crispy Golden-Brown Chicken Strips.
I remember one particularly chaotic Tuesday. School projects were due, soccer practice ran late, and the fridge seemed to stare back at me blankly. Desperate for a win, I pulled out some chicken breasts, hoping for inspiration.
That night, something magical happened. As the chicken sizzled in the pan, a warm, inviting aroma filled our kitchen. The satisfying crackle promised something special.
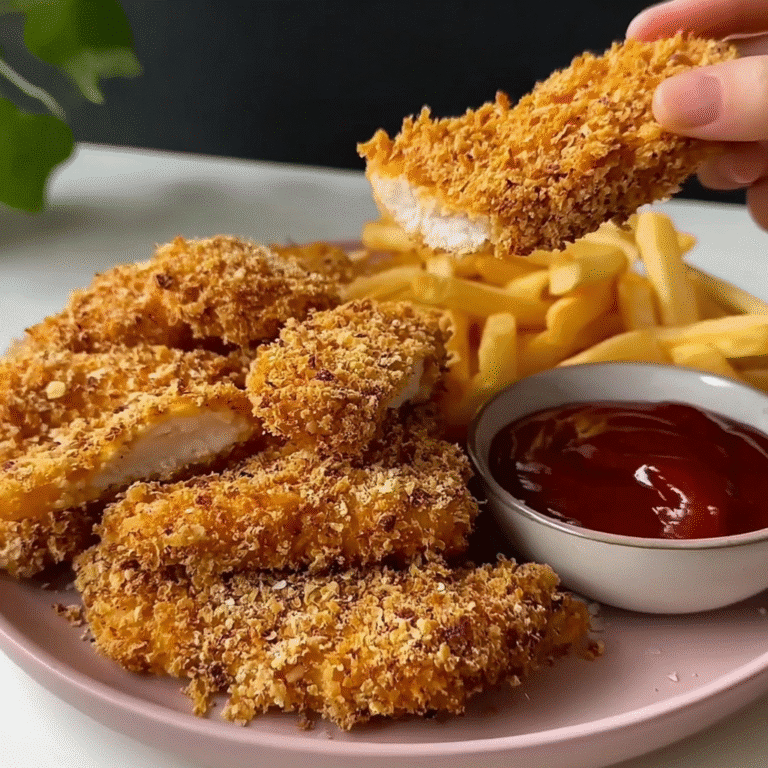
When I finally plated those beautiful, Crispy Golden-Brown Chicken Strips, my youngest, who usually dissects his food with forensic precision, just grabbed one and took a big, happy bite. Pure joy! The outer crunch gave way to tender, juicy chicken, seasoned just right.
It was a simple meal, yet it felt like a victory. From that day on, these chicken strips became a family legend, a go-to for weeknights, playdates, and even impromptu weekend lunches. They taste so much better than anything you’ll find in a drive-thru, and you know exactly what goes into them. This recipe is a testament to how simple ingredients, made with a little love, transform into something truly extraordinary and universally adored.
Why You’ll Love These Crispy Golden-Brown Chicken Strips
You’ll quickly discover why these homemade Crispy Golden-Brown Chicken Strips earn rave reviews every time. Firstly, they are incredibly easy to make, even on your busiest weeknights. Forget complicated steps or exotic ingredients; this recipe uses common pantry staples you likely already have.
Secondly, they’re a certified kid-pleaser. The perfect crunch and juicy interior make them irresistible to even the pickiest eaters, saving you from dinner-time battles. Furthermore, you control the ingredients, making them a much healthier alternative to fast-food versions loaded with preservatives and unknown additives.
You can feel good about serving your family wholesome, delicious food. These chicken strips also offer amazing versatility; they pair beautifully with almost any side dish or dipping sauce, making meal planning a breeze. Finally, nothing beats that satisfying, golden-brown crispness and tender chicken inside.
Every bite delivers a comforting, delicious experience. This recipe proves that simple, nourishing food can indeed be the most satisfying kind of love.
Ingredients You’ll Need
Creating these delightful Crispy Golden-Brown Chicken Strips requires only a handful of fresh, simple ingredients. You likely have most of these on hand already!
| Ingredient | Quantity | Notes |
|---|---|---|
| Boneless, skinless chicken breasts | 2 large (about 1.5 lbs) | Cut into uniform strips, about 1-inch thick. |
| All-purpose flour | 1 cup | For the first dredging step. |
| Large eggs | 2 | Whisked well for dipping. |
| Panko breadcrumbs | 2 cups | Panko provides the best crunch! |
| Salt | 1 teaspoon | Plus more for seasoning chicken directly. |
| Black pepper | ½ teaspoon | Freshly ground is always best. |
| Garlic powder | 1 teaspoon | Adds a lovely savory depth. |
| Paprika | ½ teaspoon | For color and mild flavor. |
| Vegetable oil (or similar neutral oil) | 3-4 cups | For frying, choose an oil with a high smoke point. |
Make sure you gather all your ingredients before you start cooking. This “mise en place” approach makes the entire process smoother and more enjoyable. High-quality ingredients truly elevate the final taste and texture of your Crispy Golden-Brown Chicken Strips, so choose fresh chicken and good quality spices. You are making food with love, after all!
Substitutions & Variations
One of the beautiful things about these Crispy Golden-Brown Chicken Strips is their adaptability. Feel free to experiment and make them your own!
Chicken Alternatives
- Chicken Thighs: For even juicier results, substitute boneless, skinless chicken thighs. Cut them into strips just like the breasts. They cook up incredibly tender and flavorful.
- Chicken Cutlets: If you prefer thinner, quicker-cooking chicken, use pre-sliced chicken cutlets. Cut them into strips or leave them as small cutlets for a different presentation.
Breading & Flavor Enhancements
- Gluten-Free Option: Easily make this recipe gluten-free. Substitute the all-purpose flour with a gluten-free all-purpose flour blend and use gluten-free panko breadcrumbs. The results are still wonderfully crispy.
- Spice It Up: Add a pinch of cayenne pepper to the flour mixture for a subtle kick. Smoked paprika deepens the flavor profile beautifully. For an Italian flair, incorporate dried oregano, basil, and a little grated Parmesan cheese into your breadcrumbs.
- Extra Crunch: While panko delivers superior crispiness, you can double-dredge for an even thicker, crunchier coating. After the first breadcrumb coat, dip the strip back into the egg wash, then into the breadcrumbs again.
- Cheesy Coating: Mix ¼ cup of finely grated Parmesan cheese into your breadcrumbs for a savory, cheesy twist. This adds incredible flavor, especially for kids!
Cooking Methods
- Air Fryer Chicken Strips: For a lighter option, air fry your chicken strips. Preheat your air fryer to 375°F (190°C). Lightly spray the breaded strips with cooking oil, then cook in a single layer for 12-18 minutes, flipping halfway through, until golden brown and cooked through. You still achieve fantastic crispiness with less oil.
- Baked Chicken Strips: Prefer to bake? Place the breaded chicken strips on a wire rack set over a baking sheet. Lightly spray with cooking oil. Bake at 400°F (200°C) for 20-25 minutes, flipping halfway, until golden and cooked to an internal temperature of 165°F (74°C). Baking still yields delicious results, though slightly less crispy than frying or air frying.
Marinades for Tenderness
- Buttermilk Soak: For incredibly tender and flavorful chicken, soak the chicken strips in buttermilk for at least 30 minutes, or up to 4 hours in the refrigerator, before dredging. The acidity of the buttermilk helps tenderize the chicken.
- Pickle Juice Brine: A quick soak in pickle juice (from a jar of dill pickles) also tenderizes chicken and adds a subtle tangy flavor that truly enhances the finished product. Soak for 30-60 minutes.
These variations let you customize your Crispy Golden-Brown Chicken Strips to suit your family’s tastes and dietary needs, ensuring they remain a versatile favorite in your kitchen.
One of the beautiful things about these Crispy Golden-Brown Chicken Strips is their adaptability. If you’re looking for another delicious twist, try out Creamy Crispy Chicken Mac & Cheese: An Incredible Ultimate Recipe!
Step-by-Step Instructions
Creating these irresistible Crispy Golden-Brown Chicken Strips is a straightforward process. Follow these steps carefully for perfectly crunchy, juicy results every time. Remember, preparation makes everything smoother!
- Prepare the Chicken: First, pat the boneless, skinless chicken breasts completely dry with paper towels. Dry chicken is key for the breading to adhere properly. Next, slice the chicken breasts into uniform strips, about 1-inch thick and 3-4 inches long. Uniform strips ensure even cooking. Season the chicken strips directly with a pinch of salt and pepper.
- Set Up Your Breading Station: Now, arrange three shallow dishes or plates in a line. In the first dish, place the all-purpose flour, along with ½ teaspoon salt, ¼ teaspoon black pepper, ½ teaspoon garlic powder, and ¼ teaspoon paprika. Whisk these together. In the second dish, whisk the two large eggs until well combined. In the third dish, place the panko breadcrumbs, along with the remaining ½ teaspoon salt, ¼ teaspoon black pepper, ½ teaspoon garlic powder, and ¼ teaspoon paprika. Stir these breadcrumbs to distribute the seasonings evenly. Seasoning each layer builds maximum flavor.
- Dredge the Chicken: Take one chicken strip at a time. First, dredge it thoroughly in the seasoned flour, shaking off any excess. Next, dip it into the whisked egg mixture, ensuring it’s fully coated. Finally, press the chicken strip firmly into the seasoned panko breadcrumbs, coating all sides. Really press the breadcrumbs onto the chicken so they stick well. Place the breaded strip on a clean plate or baking sheet. Repeat this process with all the remaining chicken strips. If time permits, refrigerate the breaded chicken for 15-20 minutes. This helps the coating adhere even better during frying.
- Heat the Oil: Pour the vegetable oil into a large, heavy-bottomed skillet or Dutch oven. You need enough oil to submerge the chicken strips halfway, about 1 to 1.5 inches deep. Heat the oil over medium-high heat until it reaches 350-375°F (175-190°C). Use a kitchen thermometer for accuracy. Proper oil temperature is crucial for crispy, non-greasy chicken. If you do not have a thermometer, drop a tiny pinch of breadcrumbs into the oil; they should sizzle vigorously and turn golden in about 10-15 seconds.
- Fry the Chicken Strips: Carefully place a few breaded chicken strips into the hot oil. Do not overcrowd the pan; fry them in batches to maintain the oil temperature and ensure even cooking. Fry for about 3-5 minutes per side, or until the Crispy Golden-Brown Chicken Strips are beautifully golden brown and cooked through. The internal temperature should reach 165°F (74°C).
- Drain and Serve: Once cooked, use tongs to remove the chicken strips from the oil. Immediately place them on a wire rack set over a baking sheet lined with paper towels. This allows excess oil to drain off, keeping them perfectly crispy. If frying multiple batches, you can keep the cooked strips warm in a preheated oven at 200°F (95°C). Serve your delicious Crispy Golden-Brown Chicken Strips immediately with your favorite dipping sauces. Enjoy!
Pro Tips for Success
Achieving truly perfect Crispy Golden-Brown Chicken Strips involves a few key techniques. These tips, straight from my kitchen to yours, guarantee maximum crispiness and flavor every time.
- Pat Chicken Dry Thoroughly: Always start by patting your chicken strips completely dry with paper towels. Excess moisture creates steam, which prevents the breading from sticking and getting truly crispy. Dry chicken allows for a superior bond with the flour, egg, and breadcrumbs.
- Season Every Layer: Do not just season the chicken. Mix salt, pepper, and other desired spices into the flour, the egg wash, and especially the panko breadcrumbs. This layering of seasoning builds deep, robust flavor throughout your Crispy Golden-Brown Chicken Strips.
- Use Panko Breadcrumbs: Panko breadcrumbs are a game-changer for crispiness. Their larger, flakier texture absorbs less oil and fries up significantly crunchier than regular breadcrumbs. Do not skip this!
- Maintain Oil Temperature: Use a kitchen thermometer to keep your oil between 350-375°F (175-190°C). Too cool, and the chicken absorbs too much oil, becoming greasy. Too hot, and the exterior burns before the inside cooks through. Consistent temperature ensures perfect golden-brown crispness and thoroughly cooked chicken.
- Do Not Overcrowd the Pan: Fry the chicken strips in batches. Overcrowding the skillet drops the oil temperature too quickly and leads to soggy, unevenly cooked chicken. Give each strip space to sizzle and brown properly.
- Firmly Press the Breading: When coating the chicken in panko, really press the breadcrumbs onto the strips. This ensures a thick, even coating that sticks well and creates that incredible crunch.
- Rest the Breaded Chicken: After breading, place the strips on a plate or baking sheet and refrigerate them for 15-20 minutes. This chilling period helps the breading adhere better, preventing it from falling off during frying.
- Drain on a Wire Rack: Once fried, immediately transfer the hot chicken strips to a wire rack set over a baking sheet lined with paper towels. This allows air to circulate around all sides, preventing the bottoms from becoming soggy as they cool. Paper towels catch any dripping oil.
Following these simple pro tips ensures your Crispy Golden-Brown Chicken Strips turn out perfect every single time, making you a kitchen superstar!
Achieving truly perfect Crispy Golden-Brown Chicken Strips involves a few key techniques. Ensure you pair your meal with Crispy Air-Fried Garlic Parmesan Baby Potatoes: An Incredible Ultimate Recipe for a side that complements the crunch!
Storage & Reheating Tips
Sometimes you have leftovers, or perhaps you want to get a head start on meal prep. Knowing how to properly store and reheat your Crispy Golden-Brown Chicken Strips ensures they remain delicious and safe to eat.
Storing Cooked Chicken Strips
- Refrigerator: Allow the cooked chicken strips to cool completely at room temperature. Then, transfer them to an airtight container. Store them in the refrigerator for up to 3-4 days. Proper cooling and sealing prevents bacterial growth and keeps them fresh.
- Freezer: For longer storage, freeze cooked chicken strips. First, place the cooled strips in a single layer on a baking sheet and freeze for about 1-2 hours until solid. This “flash freezing” prevents them from sticking together. Then, transfer the frozen strips to a freezer-safe bag or airtight container. They will keep well in the freezer for up to 2-3 months.
Reheating for Maximum Crispness
The key to reheating is avoiding the microwave, which often makes breaded items soggy. You want to bring back that delicious crunch!
- Oven Reheating: Preheat your oven to 375°F (190°C). Arrange the chicken strips in a single layer on a wire rack set over a baking sheet. Reheat for 10-15 minutes, or until heated through and crispy. This method works beautifully for restoring crispness.
- Air Fryer Reheating: This is my favorite method for bringing back that fresh-fried crunch! Preheat your air fryer to 375°F (190°C). Place the chicken strips in a single layer in the air fryer basket. Reheat for 5-8 minutes, flipping halfway, until piping hot and perfectly crispy again.
- Skillet Reheating: For a quick reheat, you can use a lightly oiled skillet over medium heat. Place the strips in the skillet and cook for 2-3 minutes per side until heated through and the exterior crisps up again.
Freezing Uncooked Chicken Strips (Meal Prep Friendly!)
You can also freeze uncooked, breaded chicken strips for ultimate convenience. After breading the chicken strips (step 3), place them in a single layer on a baking sheet and flash freeze until solid (1-2 hours). Then, transfer them to a freezer-safe bag or container. When ready to cook, you can fry them directly from frozen, adding a few extra minutes to the cooking time, or thaw them in the refrigerator first.
With these storage and reheating tips, you can enjoy your delicious Crispy Golden-Brown Chicken Strips for days or weeks to come, ensuring less food waste and more happy meals.
What to Serve With This Recipe
These versatile Crispy Golden-Brown Chicken Strips pair wonderfully with a huge variety of sides, making them perfect for any meal. Whether you want a classic comfort food feast or a lighter, healthier option, these chicken strips fit right in.
Classic Comfort Sides
- Crispy French Fries: You simply cannot go wrong with the ultimate pairing! Serve your chicken strips with a generous helping of golden, salty fries for a quintessential American meal.
- Creamy Mashed Potatoes: Soft, buttery mashed potatoes provide a comforting contrast to the crunchy chicken strips.
- Macaroni and Cheese: For a truly kid-friendly and universally loved meal, a side of gooey mac and cheese is always a hit.
- Coleslaw: A tangy, crunchy coleslaw offers a refreshing counterpoint to the richness of the fried chicken.
Healthier & Lighter Options
- Fresh Green Salad: A vibrant mixed green salad with a light vinaigrette makes a fresh and healthy accompaniment. It adds color and nutrients to your plate.
- Roasted Sweet Potatoes or Broccoli: Roasting vegetables brings out their natural sweetness and tenderness. Sweet potato wedges or roasted broccoli florets offer nutritious and flavorful sides.
- Steamed Green Beans or Asparagus: Simple steamed vegetables with a squeeze of lemon are quick to prepare and provide a healthy balance.
- Quinoa or Brown Rice: For a heartier, whole-grain option, a side of fluffy quinoa or brown rice makes a satisfying accompaniment.
Delicious Dipping Sauces
No plate of Crispy Golden-Brown Chicken Strips is complete without a selection of yummy dipping sauces! Offer a few choices to please everyone.
- Honey Mustard: Sweet and tangy, a classic favorite for chicken strips.
- BBQ Sauce: Smoky and sweet, a robust choice.
- Ranch Dressing: Creamy, savory, and always a hit with kids and adults alike.
- Ketchup: The timeless, simple dipping sauce that never disappoints.
- Homemade Creamy Garlic Dip: Whisk together Greek yogurt or sour cream with minced garlic, fresh chives, a squeeze of lemon juice, salt, and pepper for a fresh, homemade option.
- Spicy Mayo: Mix mayonnaise with a dash of Sriracha or your favorite hot sauce for a zesty kick.
Mix and match these suggestions to create a perfect meal centered around your amazing Crispy Golden-Brown Chicken Strips. The possibilities are endless!
These versatile Crispy Golden-Brown Chicken Strips pair wonderfully with a huge variety of sides. For a delightful combination, consider serving them alongside Crispy Potatoes Saucy Beef for a hearty meal.
FAQs
Here are some common questions about making Crispy Golden-Brown Chicken Strips, along with my helpful answers to ensure your success.
How do I get my Crispy Golden-Brown Chicken Strips extra crispy?
Achieving maximum crispness comes down to a few key factors. First, use panko breadcrumbs; their flaky texture yields a superior crunch compared to regular breadcrumbs. Second, ensure your oil temperature stays consistent between 350-375°F (175-190°C) and avoid overcrowding the pan, which drops the oil temperature.
Third, after frying, drain the chicken on a wire rack to prevent sogginess. Finally, for reheating, always opt for the oven or air fryer over the microwave.
Can I bake these chicken strips instead of frying?
Absolutely! Baking is a great alternative for a lighter version of these Crispy Golden-Brown Chicken Strips. After breading, place the strips on a wire rack set over a baking sheet.
Lightly spray them with cooking oil. Bake at 400°F (200°C) for 20-25 minutes, flipping halfway, until golden and cooked through (internal temperature 165°F/74°C). They will still be delicious and relatively crispy, though generally less intense than deep-fried or air-fried versions.
What’s the best way to prevent the breading from falling off?
Several steps help prevent breading from detaching. First, pat the chicken completely dry before dredging. Moisture is the enemy of adherence.
Second, use a proper three-step breading station (flour, egg, then breadcrumbs), ensuring each layer coats thoroughly. Third, firmly press the breadcrumbs onto the chicken, really making them stick. Lastly, if time allows, refrigerate the breaded chicken for 15-20 minutes before frying. This chilling process helps the coating set and adhere better.
Are these chicken strips healthy?
These homemade Crispy Golden-Brown Chicken Strips are a healthier choice than many fast-food or pre-packaged versions. You control the quality of the ingredients, using lean protein and fresh spices. While deep-frying adds calories from oil, you can significantly reduce the fat content by opting to air fry or bake them.
Choosing wholesome sides like a big salad or roasted vegetables further enhances the nutritional value of your meal. They provide a nourishing, satisfying meal you can feel good about.
Can I make these ahead of time?
Yes, you can certainly prepare these Crispy Golden-Brown Chicken Strips ahead of time. You have a few options: you can bread the chicken strips a few hours in advance and keep them covered in the refrigerator until ready to fry. You can also flash freeze the breaded (uncooked) chicken strips and store them in the freezer for later cooking.
Alternatively, cook them completely, cool, and then store them in the refrigerator or freezer, reheating them later using the oven or air fryer for best results. This makes meal prep a breeze!
Crispy Golden-Brown Chicken Strips
These Crispy Golden-Brown Chicken Strips are a family favorite that delivers delicious crunch and juicy chicken every time. They're easy to make and require simple ingredients, perfect for busy weeknights.
- Total Time: 30 mins
- Yield: 4 servings 1x
Ingredients
1.5 lbs Boneless, skinless chicken breasts
1 cup All-purpose flour
2 Large eggs
2 cups Panko breadcrumbs
1 teaspoon Salt
0.5 teaspoon Black pepper
1 teaspoon Garlic powder
0.5 teaspoon Paprika
3–4 cups Vegetable oil (for frying)
Instructions
- Prepare the chicken by patting it dry and cutting into uniform strips
- Set up the breading station with flour mixture, egg wash, and panko breadcrumbs
- Dredge the chicken strips in flour, then in the egg, and finally in the breadcrumbs
- Heat oil in a skillet to 350-375°F (175-190°C)
- Fry the chicken strips in batches for 3-5 minutes per side until golden brow
- Drain on a wire rack and serve with preferred dipping sauces
Notes
For extra crispy strips, refrigerate the breaded chicken for 15-20 minutes before frying.
- Prep Time: 20 mins
- Cook Time: 10 mins
- Category: Dinner
- Method: Frying
- Cuisine: American
- Diet: Gluten Free
Nutrition
- Serving Size: 1 serving
- Calories: 500 kcal
- Sugar: 0 g
- Sodium: 800 mg
- Fat: 30 g
- Saturated Fat: 5 g
- Unsaturated Fat: 20 g
- Trans Fat: 0 g
- Carbohydrates: 40 g
- Fiber: 2 g
- Protein: 30 g
- Cholesterol: 150 mg
Crispy chicken strips are a beloved dish enjoyed for their crunchy texture and juicy interior, making them a favorite at family dinners and gatherings. Their appeal lies in simple preparation methods that yield delicious results, a hallmark of classic comfort food that many appreciate. Learn more about this delightful dish here.