Oh, Key Lime Pie. Just the name conjures up sunshine, laughter, and that irresistible zing that makes your taste buds sing. For me, Emilia, a mom of three who finds joy and connection in every meal we share, this isn’t just a dessert; it’s a memory-maker.
I remember the first time I tasted a truly authentic Key Lime Pie. We were on a family vacation, the kind where the days stretch out long and golden, and the air smells like salt and possibility. My youngest, then just a toddler, had smeared a tiny bit of the creamy, vibrant filling across her cheek, giggling with pure delight. It was sweet, it was tart, it was utterly refreshing, and it captured the essence of simple summer joy.
From that moment, I knew I needed to master this classic. But not just any Key Lime Pie. I wanted a recipe that was easy enough for a busy weeknight (because let’s be real, who has endless hours?), wholesome enough that I felt good serving it to my family, and delicious enough to become a staple at every gathering.
After much trial and error (and many happy taste tests from my enthusiastic crew), I perfected this simple, utterly delightful Key Lime Pie. It’s a testament to the idea that food doesn’t have to be complicated to be absolutely wonderful. This recipe brings that sunshine and warmth right into our kitchen, reminding us that sometimes, the simplest things bring the greatest joy. Get ready to bake a pie that tastes like pure love and sunshine!
Why You’ll Love This Key Lime Pie Recipe
You absolutely will adore this Key Lime Pie recipe, and for so many fantastic reasons. First, its simplicity is a game-changer. As a busy mom, I appreciate recipes that deliver maximum flavor with minimal fuss.
This pie comes together quickly, leaving you more time for family and less time stressed in the kitchen. Second, the flavor profile is simply unmatched. It strikes the perfect balance between sweet and tart, bright and creamy.
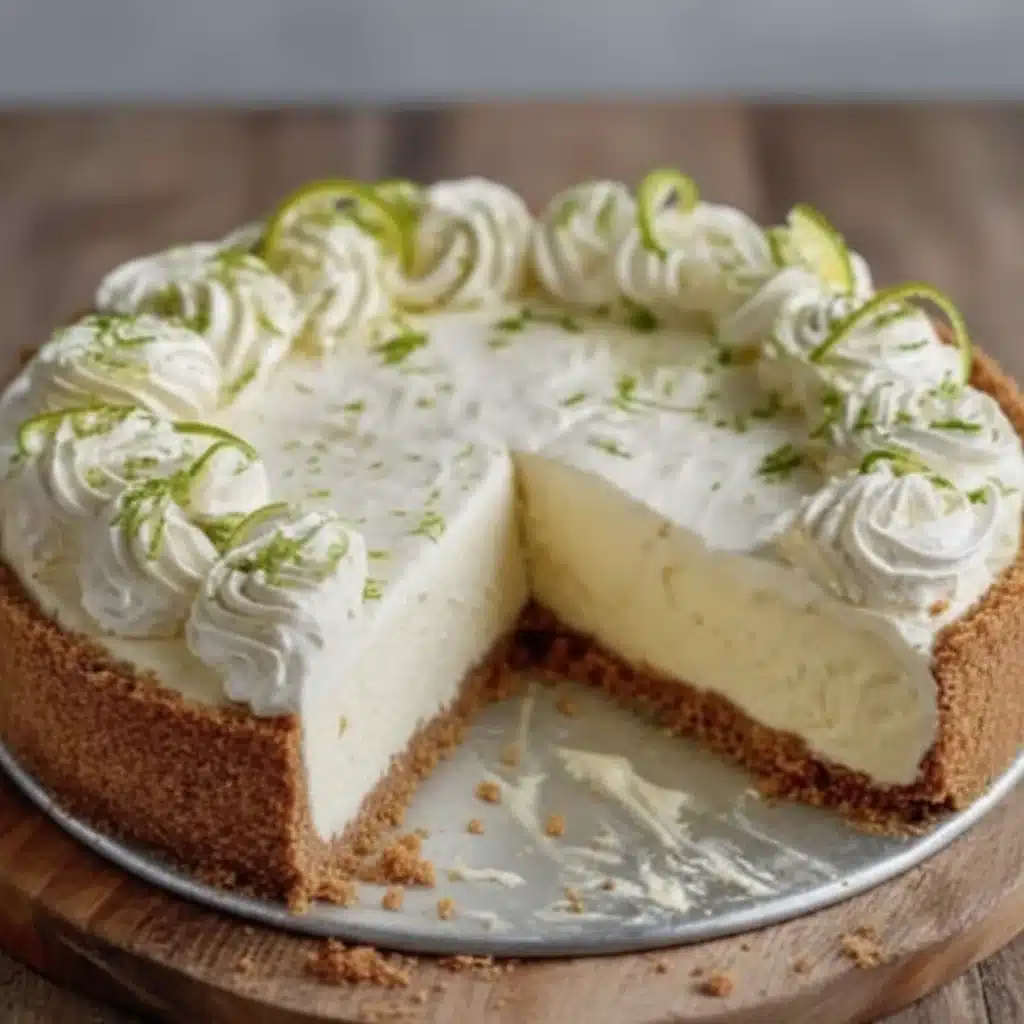
Each bite offers a burst of refreshing lime, beautifully complemented by the rich, smooth filling and the crunchy graham cracker crust. It’s a truly invigorating dessert.
Furthermore, this Key Lime Pie is an undeniable crowd-pleaser. Whether you serve it at a backyard barbecue, a holiday gathering, or simply as a special weeknight treat, people always rave about it. Its vibrant, sunny disposition lightens any mood and brightens any table.
You also love knowing you are making a homemade dessert with real, simple ingredients. I believe food is love, and sharing a delicious, homemade Key Lime Pie with your loved ones truly embodies that sentiment. It’s more than just a dessert; it’s an experience that brings smiles and creates cherished memories. This recipe consistently delivers perfect results, making you feel like a culinary star every time you pull it from the fridge.
Ingredients You’ll Need
Gathering your ingredients for this Key Lime Pie is incredibly simple. We focus on fresh, high-quality components to ensure the best flavor.
| For the Graham Cracker Crust | For the Key Lime Filling | For Serving (Optional) |
|---|---|---|
| 1 ½ cups graham cracker crumbs (about 10-12 full sheets) | 1 (14-ounce) can sweetened condensed milk | Fresh whipped cream |
| ¼ cup granulated sugar | ½ cup Key lime juice (freshly squeezed is best!) | Lime zest or thin lime slices |
| 6 tablespoons unsalted butter, melted | 1 large egg yolk |
A few notes on ingredients:
* Key Limes: You truly want to use Key limes for that authentic, distinct flavor. Regular limes work in a pinch, but the unique tartness of Key limes makes all the difference. You will need quite a few, so plan accordingly!
* Sweetened Condensed Milk: Make sure you grab *sweetened condensed milk*, not evaporated milk. They are not interchangeable in this recipe.
* Butter: Use unsalted butter for the crust; it gives you better control over the saltiness.
* Egg Yolk: The egg yolk acts as an emulsifier, helping the filling set beautifully and adding richness.
Substitutions & Variations
One of the beautiful things about cooking is the ability to adapt and personalize recipes. This Key Lime Pie recipe, while perfect as is, offers wonderful flexibility for substitutions and variations. You can truly make it your own!
First, let’s talk about the crust. While a classic graham cracker crust is divine, you have other fantastic options.
* Vanilla Wafer Crust: Crush vanilla wafers for a subtly sweeter, buttery crust.
It pairs beautifully with the tart lime.
* Pretzel Crust: For a sweet and salty twist, try a crushed pretzel crust. It offers a delightful textural contrast and an unexpected flavor profile.
* Gluten-Free Crust: Simply use gluten-free graham crackers to make your crumbs. The rest of the process remains the same, ensuring everyone can enjoy a slice.
Next, consider the lime juice.
* Regular Limes: If Key limes are unavailable or too expensive, don’t despair! You can absolutely use regular Persian lime juice.
The flavor will be slightly different—less floral and a bit sharper—but still delicious. You might adjust the sugar slightly if you find it too tart.
* Lemon: For a “Key Lemon Pie,” swap the Key lime juice for fresh lemon juice. This creates a wonderfully bright and tangy dessert in its own right.
Finally, you can get creative with toppings and additions.
* Meringue Topping: Instead of simple whipped cream, consider a fluffy, toasted meringue topping. Beat egg whites with sugar until stiff peaks form, spread over the chilled pie, and lightly brown with a kitchen torch or under the broiler for a few minutes.
* Coconut Infusion: Add a teaspoon of coconut extract to the filling for a tropical twist. You could also sprinkle toasted coconut flakes over the whipped cream.
* Fruit Garnish: Beyond lime slices, consider fresh berries like raspberries or blueberries.
Their sweetness and color offer a lovely contrast.
* Dairy-Free Option: For a dairy-free Key Lime Pie, look for dairy-free sweetened condensed coconut milk and use a plant-based butter alternative for the crust. Ensure your graham crackers are also dairy-free. The texture might vary slightly, but the flavor remains wonderfully zesty.
Embrace these variations! They allow you to cater to different tastes, dietary needs, or simply to try something new each time you make this incredible Key Lime Pie.
One of the beautiful things about cooking is the ability to adapt and personalize recipes. If you’re looking for another incredible dish to make with turkey, check out Turkey Stew: An Incredible Ultimate Recipe.
Step-by-Step Instructions
Making this Key Lime Pie is a straightforward process, breaking down into three simple stages: preparing the crust, mixing the filling, and chilling. You will find each step easy to follow, leading you to a perfectly set, deliciously tangy pie.
Step 1: Prepare Your Oven and Pie Dish
Preheat your oven to 350°F (175°C). Lightly grease a 9-inch pie dish. This ensures easy removal of your slices later.
Step 2: Make the Graham Cracker Crust
First, combine the graham cracker crumbs, granulated sugar, and melted butter in a medium bowl. Use a fork or your hands to mix everything thoroughly until the crumbs are uniformly moistened. The mixture should resemble wet sand.
Next, press the crumb mixture firmly and evenly into the bottom and up the sides of your prepared pie dish. Use the bottom of a flat glass or a measuring cup to help you create a compact, even crust. A firm crust prevents crumbling when you cut the pie.
Now, bake the crust for 8-10 minutes. You want it to be lightly golden and fragrant. Baking the crust first helps it stay crisp and prevents it from becoming soggy once you add the filling. Remove the crust from the oven and let it cool completely on a wire rack while you prepare the filling.
Step 3: Prepare the Key Lime Filling
Reduce your oven temperature to 325°F (160°C).
In a large bowl, whisk together the sweetened condensed milk, freshly squeezed Key lime juice, and egg yolk. Whisk vigorously until the mixture is completely smooth and thickened.
This happens fairly quickly as the acid from the lime juice reacts with the milk. The mixture should become pale yellow and glossy. Do not overmix, just whisk until well combined.
Step 4: Bake the Key Lime Pie
Pour the prepared Key lime filling into the cooled graham cracker crust. Gently spread the filling evenly with a spatula if needed.
Carefully place the pie dish into your preheated oven.
Bake for 15-20 minutes, or until the center of the pie is just set. The edges should appear firm, but the very center might still have a slight jiggle, like gelatin. Overbaking can cause cracks, so watch it closely. Remember, the pie will continue to set as it cools.
Step 5: Chill Your Pie
Remove the pie from the oven and let it cool completely on a wire rack at room temperature. This usually takes about an hour.
Once cooled, cover the pie loosely with plastic wrap and transfer it to the refrigerator.
You must chill the Key Lime Pie for at least 4 hours, but preferably overnight. This crucial step allows the pie to fully set and develop its signature firm, creamy texture.
Step 6: Serve and Enjoy!
Before serving, garnish your chilled Key Lime Pie with fresh whipped cream and a sprinkle of lime zest or thin lime slices, if desired. Cut into wedges and serve cold. Each slice offers that perfect balance of tangy, sweet, and creamy, making every bite a delight.
Pro Tips for Success
Achieving Key Lime Pie perfection is absolutely within your reach with a few helpful tips. These small details make a big difference, transforming a good pie into an unforgettable one.
* Fresh Key Lime Juice is Non-Negotiable: This is arguably the most important tip. Bottled Key lime juice exists, but it simply cannot replicate the vibrant, floral, and authentic tang of fresh Key limes. Invest the time (and maybe a good citrus press!) to squeeze fresh juice.
You’ll taste the difference immediately.
* Get the Most Juice from Your Limes: Before squeezing, roll your Key limes firmly on a countertop for about 30 seconds. You can also microwave them for 10-15 seconds.
This helps break down the membranes inside, making them much easier to juice and yielding more liquid.
* Zest Your Limes First: If you plan to use lime zest for garnish, zest the whole limes *before* you cut and juice them. It is infinitely easier to zest a firm, whole lime than a juiced half.
* Do Not Overbake the Filling: This is a common mistake. Key Lime Pie filling sets as it cools. You want to bake it just until the edges appear firm and the center has a slight jiggle, similar to a firm custard.
Overbaking leads to cracks and a less creamy texture. Keep a close eye on it!
* Chill, Chill, Chill: Patience is a virtue when it comes to Key Lime Pie.
A minimum of 4 hours in the refrigerator is essential for the pie to fully set. Overnight chilling gives you the best, most sliceable result. Rushing this step leads to a runny pie.
* Use High-Quality Sweetened Condensed Milk: Since this is a core ingredient, choose a brand you trust. The quality of your sweetened condensed milk directly impacts the creaminess and sweetness of your filling.
* Compact Crust is Key: When pressing your graham cracker crust into the pie dish, really pack it down firmly.
Use the bottom of a flat-bottomed glass or a measuring cup. A tightly packed crust holds together beautifully when you slice the pie.
* Serve Cold with Fresh Whipped Cream: Key Lime Pie is best served well-chilled.
A dollop of freshly made, lightly sweetened whipped cream cuts through the tartness perfectly and adds a luxurious texture. Store-bought whipped topping just doesn’t compare!
Following these pro tips ensures you create a Key Lime Pie that impresses every time—creamy, tangy, and utterly irresistible.
Achieving Key Lime Pie perfection is absolutely within your reach with a few helpful tips. To expand your culinary repertoire, consider trying the Easy Ground Turkey and Zucchini Skillet: An Incredible Ultimate Recipe.
Storage & Reheating Tips
Properly storing your Key Lime Pie ensures every slice remains as delicious as the first. This is a pie that loves the cold!
Storage:
You must store Key Lime Pie in the refrigerator. After the initial chilling period, cover the pie loosely with plastic wrap or aluminum foil. You can also transfer any leftover slices to an airtight container.
This prevents the pie from absorbing refrigerator odors and helps maintain its creamy texture. Key Lime Pie will keep beautifully in the refrigerator for up to 3-4 days. For optimal freshness and flavor, I recommend enjoying it within the first two days.
Freezing:
Yes, you can freeze Key Lime Pie! This is fantastic for making ahead or saving leftovers for a later date.
1.
Freeze Whole Pie (Uncut): Once the pie is completely chilled and firm, wrap it tightly in several layers of plastic wrap, then an outer layer of aluminum foil. This double layer protects against freezer burn.
2.
Freeze Individual Slices: Cut the pie into individual slices. Place each slice on a parchment-lined baking sheet and freeze until firm (about 1-2 hours). Then, wrap each frozen slice tightly in plastic wrap and store them together in an airtight freezer bag or container.
This way, you can grab just one slice whenever a craving strikes!
Frozen Key Lime Pie can last for up to 1 month. Beyond that, the quality may start to diminish, though it would still be safe to eat.
Reheating Tips:
Key Lime Pie is a cold dessert. You do not reheat it.
* From the Refrigerator: Simply remove your pie or slices from the refrigerator, unwrap, and serve directly.
* From the Freezer (Whole Pie): Transfer the frozen, wrapped pie to the refrigerator and let it thaw overnight (8-12 hours) before serving.
* From the Freezer (Individual Slices): Place a frozen slice on a plate and let it thaw in the refrigerator for 2-3 hours, or on the countertop for about 30-60 minutes, depending on your room temperature.
Always serve Key Lime Pie chilled. Its refreshing qualities are best enjoyed when cold.
What to Serve With This Recipe
Key Lime Pie, with its vibrant, tangy profile, makes a show-stopping dessert on its own. However, pairing it with the right complements can elevate the entire experience. Think about balancing its richness and tartness with other flavors and textures.
* Fresh Whipped Cream: This is the quintessential pairing. A cloud of lightly sweetened, freshly whipped cream offers a soft, airy contrast to the pie’s dense, creamy filling and tart flavor. It mellows the tang just enough without overshadowing it.
* Fresh Berries: A handful of fresh raspberries, blueberries, or sliced strawberries adds a beautiful pop of color and a touch of natural sweetness. Their slight acidity complements the lime without competing.
* Coffee or Tea: A strong, hot cup of coffee, an espresso, or even a refreshing iced tea provides a lovely beverage pairing.
The slight bitterness of coffee or the herbal notes of tea cleanse the palate beautifully between bites of the sweet and tart pie.
* Tropical Fruit Salad: For a truly sunny dessert spread, serve slices of Key Lime Pie alongside a simple tropical fruit salad featuring mango, pineapple, and papaya. This amplifies the tropical feel.
* A Light Dinner: Because Key Lime Pie is so rich and flavorful, it pairs best with a light main course. Think grilled fish, chicken breast with fresh herbs, or a vibrant salad. You want your palate to be ready for its bright flavors!
* Sparkling Water with Lime: A simple glass of sparkling water with a squeeze of fresh lime offers a crisp, palate-cleansing beverage that keeps the citrus theme going.
Remember, the goal is to enhance the Key Lime Pie, not to overpower it. Keep it simple, fresh, and delicious, just like the pie itself.
Key Lime Pie, with its vibrant, tangy profile, makes a show-stopping dessert on its own. For nutritious ideas that can complement your meals, check out the details on How Many Calories in a Cup of Panera Turkey Chili?.
FAQs About Key Lime Pie
You have questions about Key Lime Pie, and I have answers! Here are some common inquiries about this beloved dessert.
What makes Key Lime Pie authentic?
Authentic Key Lime Pie truly comes down to the ingredients. You must use fresh Key lime juice for its unique, floral, and highly aromatic tartness, which differs significantly from regular Persian limes. It also features a filling made from sweetened condensed milk and egg yolks (which cook with the lime’s acidity, so minimal baking is needed) and a graham cracker crust. Simplicity and these specific ingredients define its authenticity.
Can I use regular limes instead of Key limes?
Yes, you certainly can use regular Persian limes if you cannot find Key limes. The pie will still taste delicious, but you will notice a slight difference. Regular limes are larger, less aromatic, and have a sharper, less floral tartness compared to their smaller, tangier Key lime cousins. You might need slightly less regular lime juice, or adjust sweetness to your preference.
How do I know when Key Lime Pie is done baking?
You know your Key Lime Pie is done baking when the edges appear firm and set, but the very center still has a slight jiggle to it, like a firm gelatin. The pie will continue to set as it cools, so resist the urge to overbake it. Overbaking leads to cracks and a firmer, less creamy texture.
Why is my Key Lime Pie runny?
Your Key Lime Pie is likely runny because you didn’t chill it long enough or you didn’t use enough lime juice for the chemical reaction to occur. The acid in the Key lime juice “cooks” the sweetened condensed milk and egg yolk, causing it to thicken and set. Adequate chilling time—at least 4 hours, preferably overnight—is crucial for the pie to fully firm up. Ensure you use the exact amount of fresh Key lime juice specified in the recipe.
Can I make Key Lime Pie ahead of time?
Absolutely! Key Lime Pie is an excellent make-ahead dessert. In fact, making it ahead allows it sufficient time to chill and set properly, resulting in a perfect slice.
You can prepare the entire pie one or even two days in advance. Just cover it loosely and store it in the refrigerator until you are ready to serve. This also makes entertaining so much easier!
Is Key Lime Pie supposed to be tart?
Yes, Key Lime Pie is absolutely supposed to be tart! That signature tangy zing is a hallmark of this classic dessert. The tartness from the Key limes perfectly balances the sweetness of the condensed milk.
If your pie isn’t tart enough, you might have used too little lime juice or used regular limes, which are generally less tart than Key limes. Embrace that wonderful, refreshing tang!
Print
Key Lime Pie
This Key Lime Pie recipe is a delightful balance of sweet and tart flavors, capturing the essence of summer in every bite. It's simple to prepare, perfect for any gathering, and becomes a cherished memory-maker in your family.
- Total Time: 4 hours 40 mins
- Yield: 8 servings 1x
Ingredients
1 ½ cups Graham cracker crumbs
¼ cup Granulated sugar
6 tablespoons Unsalted butter, melted
1 (14-ounce) can Sweetened condensed milk
½ cup Key lime juice
1 large Egg yolk
Fresh whipped cream for serving
Instructions
- Preheat your oven to 350°F (175°C) and grease a 9-inch pie dish
- Combine graham cracker crumbs, granulated sugar, and melted butter; press into pie dish and bake for 8-10 minutes until lightly golde
- Reduce oven temperature to 325°F (160°C)
- In a bowl, whisk together sweetened condensed milk, Key lime juice, and egg yolk until smooth
- Pour filling into crust and bake for 15-20 minutes until edges are set
- Let cool, then chill in the refrigerator for at least 4 hours before serving with fresh whipped cream
Notes
For the best flavor, use fresh Key lime juice.
Ensure proper chilling time for optimal texture.
- Prep Time: 20 mins
- Cook Time: 20 mins
- Category: Dessert
- Method: Baking
- Cuisine: American
- Diet: Gluten Free
Nutrition
- Serving Size: 1 slice
- Calories: 250 kcal
- Sugar: 20 g
- Sodium: 150 mg
- Fat: 14 g
- Saturated Fat: 8 g
- Unsaturated Fat: 4 g
- Trans Fat: 0 g
- Carbohydrates: 30 g
- Fiber: 1 g
- Protein: 3 g
- Cholesterol: 50 mg
Key Lime Pie is a classic American dessert that features a creamy filling made from key lime juice, egg yolks, and sweetened condensed milk, nestled in a crumbly crust. This beloved treat captures the essence of summer with its tangy flavor and is often served with a dollop of whipped cream for added richness; learn more about its delightful history and variations in this informative article.
