
Oh, lemon bars. Just saying the words brings a little sunshine into my kitchen. For me, Emilia, a busy mom of three, food isn’t just fuel; it’s a language of love, a way to gather my family around the table, and a source of pure joy.
And these homemade lemon bars? They speak volumes! I remember the first time I whipped up a batch of these bright, zesty squares.
It was a grey, rainy Saturday, and the kids were bouncing off the walls. I craved something light, something that felt like a hug. That afternoon, the aroma of fresh lemon zest and butter baking filled every corner of our home.
When the first tray of golden, powdery lemon dessert emerged from the oven, my youngest, Leo, with flour still dusting his cheeks from “helping,” let out an excited squeal. One bite, and it was instant magic. The perfect balance of sweet and tart, the melt-in-your-mouth shortbread crust, and that vibrant, citrusy tang – it was a ray of sunshine on a plate.
Since then, these easy lemon squares have become a staple in our household. They’re our go-to for school bake sales, potlucks, and frankly, any day that needs a little extra brightness. There’s something so incredibly satisfying about creating a dessert that looks elegant but is deceptively simple to make.
Every time I prepare these lemon bars, I’m reminded that the simplest ingredients often yield the most extraordinary results. This isn’t just a recipe; it’s a memory maker, a smile generator, and a little piece of sunshine you can hold in your hand.
Why You’ll Love This Lemon Dessert Recipe
You need this lemon bars recipe in your life, plain and simple. First, it’s ridiculously easy. We’re talking minimal effort for maximum impact.
You don’t need fancy equipment or a culinary degree to create these show-stopping treats. Second, the flavor profile is utterly irresistible. Imagine a buttery, crumbly shortbread crust providing the perfect foundation for a silky, tangy lemon filling.
It’s a symphony of textures and tastes that awakens your palate. Furthermore, these lemon squares are a fantastic make-ahead option. You can bake them, chill them, and simply dust with powdered sugar just before serving.
They’re perfect for brunches, picnics, parties, or a quiet afternoon pick-me-up. Finally, this recipe is a true crowd-pleaser. Even the pickiest eaters (yes, my own kids included!) devour these bright, zesty bars.
They offer a refreshing change from heavier desserts and bring a burst of cheer to any occasion. You will fall in love with their simplicity, their incredible flavor, and the sheer joy they bring to your table.
Ingredients You’ll Need
Gathering your ingredients is the first step to creating these delightful lemon bars. You’ll find most of these staples right in your pantry, showcasing just how simple it is to create something spectacular.
For the Crust:
| Ingredient | Quantity |
|---|---|
| All-purpose flour | 2 cups |
| Granulated sugar | 1/2 cup |
| Salt | 1/4 teaspoon |
| Unsalted butter, cold and cubed | 1 cup (2 sticks) |
For the Lemon Filling:
| Ingredient | Quantity |
|---|---|
| Granulated sugar | 2 cups |
| All-purpose flour | 1/4 cup |
| Large eggs | 4 |
| Fresh lemon juice | 2/3 cup (about 4-5 lemons) |
| Lemon zest | 2 tablespoons (from 2-3 lemons) |
| Powdered sugar (for dusting) | As needed |
Substitutions & Variations
This classic lemon bars recipe provides a wonderful foundation, but don’t hesitate to experiment! You can easily adapt it to suit dietary needs or simply add a twist of your own.
- Gluten-Free Lemon Bars: Replace the all-purpose flour in both the crust and the filling with a 1:1 gluten-free all-purpose baking flour blend. Make sure your blend contains xanthan gum for the best texture.
- Dairy-Free Option: Use a high-quality plant-based butter substitute (like Miyoko’s Kitchen or Earth Balance sticks) for the crust. For the filling, this recipe is naturally dairy-free already!
- Other Citrus Zest: While lemon is king, feel free to try other citrus. Orange zest, lime zest, or a combination (like lemon-lime bars) offer a delightful twist. Just remember that lime is more tart, so you might adjust the sugar slightly.
- Adding a Little More Zing: For an extra lemony kick, add an additional teaspoon of lemon zest to the crust mixture. It enhances the overall citrus profile beautifully.
- Herbal Infusion: Consider adding a teaspoon of finely chopped fresh rosemary or thyme to the lemon filling. These herbs pair surprisingly well with lemon, offering an aromatic, sophisticated touch.
- Topping Variations: Instead of just powdered sugar, garnish your lemon squares with fresh berries (raspberries or blueberries are fantastic), a dollop of homemade whipped cream, or even a light drizzle of white chocolate.
- Less Sweet Option: If you prefer your lemon bars on the extra-tart side, you can reduce the sugar in the filling by 1/4 to 1/2 cup. Taste the mixture before baking to ensure it’s to your liking.
While this classic lemon bars recipe provides a wonderful foundation, don’t hesitate to explore other delightful lemon dishes! For an incredible twist, consider trying our Lemon Chicken Orzo Soup: An Incredible Ultimate Recipe that perfectly complements the flavors of lemon.
Step-by-Step Instructions
Creating these perfect lemon bars is simpler than you think. Follow these clear steps, and you’ll have a batch of sunshine on your counter in no time!
- Preheat Oven & Prep Pan: First, preheat your oven to 350°F (175°C). Line a 9×13-inch baking pan with parchment paper, leaving an overhang on the sides. This creates “slings” and makes lifting the cooled bars out incredibly easy. Lightly grease the parchment paper with cooking spray or butter.
- Make the Crust: In a large bowl, whisk together the 2 cups of all-purpose flour, 1/2 cup granulated sugar, and 1/4 teaspoon salt. Cut in the cold, cubed butter using a pastry blender, two knives, or your fingertips. Mix until the mixture resembles coarse crumbs with some pea-sized pieces of butter remaining.
- Press the Crust: Press the crumb mixture evenly into the bottom of your prepared baking pan. Use the bottom of a flat glass or a measuring cup to help you create a firm, even layer.
- Blind Bake the Crust: Bake the crust in the preheated oven for 18-20 minutes, or until it turns lightly golden brown around the edges. This “blind baking” ensures a crisp, sturdy base for your lemon squares.
- Prepare the Lemon Filling: While the crust bakes, prepare the filling. In a separate large bowl, whisk together the 2 cups granulated sugar and 1/4 cup all-purpose flour until well combined. This prevents lumps.
- Add Wet Ingredients: Add the 4 large eggs, 2/3 cup fresh lemon juice, and 2 tablespoons lemon zest to the sugar-flour mixture. Whisk vigorously until the mixture is completely smooth and evenly combined. Do not overmix; just combine until uniform.
- Pour & Bake Filling: Once the crust is lightly golden, carefully remove the pan from the oven. Pour the lemon filling evenly over the hot crust. Return the pan to the oven.
- Bake the Lemon Bars: Bake for an additional 20-25 minutes, or until the filling is set. You will know it’s done when the edges are lightly golden and the center no longer jiggles significantly when you gently shake the pan. A slight jiggle is okay; it will firm up as it cools.
- Cool Completely: Remove the pan from the oven and place it on a wire rack. Let the lemon bars cool completely in the pan at room temperature. This can take 1-2 hours.
- Chill for Setting: Once cooled to room temperature, transfer the pan to the refrigerator. Chill for at least 2 hours, or preferably overnight. Chilling is crucial for the filling to fully set and for clean cuts.
- Cut & Serve: Use the parchment paper overhangs to lift the chilled slab of lemon bars out of the pan. Place it on a cutting board. Dust generously with powdered sugar just before slicing. Use a sharp knife, wiping it clean between cuts, to create neat squares or rectangles. Serve and enjoy!
Pro Tips for Success
Achieving bakery-quality lemon bars at home is entirely doable with a few insider tricks. These tips come from years of trial and error in my own kitchen, ensuring your lemon squares turn out perfect every single time.
- Use Cold Butter for the Crust: This is non-negotiable for a tender, flaky shortbread crust. Cold butter creates pockets of steam during baking, which results in a lighter, more crumbly texture. If your butter softens, pop it back in the fridge before mixing.
- Don’t Skip Blind Baking the Crust: Baking the crust by itself ensures it gets perfectly golden and crispy before the wet filling goes in. This prevents a soggy bottom, a common pitfall in many bar recipes.
- Fresh Lemon Juice and Zest are Key: Bottled lemon juice simply doesn’t compare. Freshly squeezed lemon juice provides the bright, vibrant flavor these bars are famous for. Also, don’t skimp on the zest; it contains concentrated lemon oil, boosting the citrus punch significantly. Use a microplane for the finest zest without the bitter white pith.
- Measure Flour for Filling Accurately: The small amount of flour in the filling acts as a stabilizer, preventing the lemon curd from becoming too runny. Measure it accurately by spooning it into a measuring cup and leveling it off.
- Don’t Overbake the Filling: Watch your lemon bars closely during the second bake. Overbaking can lead to a rubbery texture or cracks in the filling. The center should have a slight jiggle, like a loose Jell-O, but not be liquid. It will firm up beautifully as it cools.
- Cool Completely and Chill Thoroughly: Patience is a virtue here! Cooling at room temperature first, then chilling in the refrigerator for at least 2 hours (or overnight), is crucial. This allows the lemon filling to set properly, giving you clean, neat slices without a messy, gooey center.
- Dust with Powdered Sugar Just Before Serving: Powdered sugar absorbs moisture, so if you dust your lemon bars too early, it will dissolve into the filling. Dusting right before serving ensures that beautiful, snowy white finish.
- Clean Knife for Clean Cuts: For perfectly neat squares, use a long, sharp knife. Wipe the blade clean with a damp paper towel after each cut. This prevents the sticky filling from dragging and ruining the appearance of subsequent slices.
Achieving bakery-quality lemon bars at home is entirely doable with a few insider tricks that I’ve perfected. For another delicious lemon dish, check out our Garlic Lemon Chicken with Pasta: An Incredible Ultimate Recipe which showcases the versatility of lemon in savory dishes.
Storage & Reheating Tips
Proper storage ensures your beautiful lemon bars remain fresh and delicious for as long as possible. Fortunately, they store wonderfully, making them an excellent make-ahead dessert.
- Room Temperature: While delicious, lemon bars with their fresh lemon filling are best stored in the refrigerator. They can sit out at room temperature for an hour or two for serving, but prolonged exposure can affect their quality and food safety.
- Refrigerator Storage: Store cooled and cut lemon bars in an airtight container in the refrigerator. Layer them with parchment paper between layers to prevent sticking if you’re stacking them. They will stay fresh and delicious for up to 5-7 days.
- Freezing: Yes, you can freeze lemon bars! For best results, freeze them uncut in the pan after they have completely cooled and chilled. Wrap the entire pan tightly with plastic wrap, then with aluminum foil. Alternatively, cut the bars and place them in a single layer on a baking sheet, freeze until solid, then transfer them to an airtight freezer-safe container or freezer bag, again layering with parchment paper. They will keep well for up to 1-2 months.
- Thawing: To thaw frozen lemon bars, simply transfer them from the freezer to the refrigerator overnight. You can also thaw them at room temperature for a couple of hours if you’re in a hurry. Dust with fresh powdered sugar just before serving after they are fully thawed.
- Reheating: Lemon bars are typically served chilled or at room temperature; they do not require reheating. In fact, reheating can negatively affect the texture of the filling, making it too soft.
What to Serve With This Recipe
These bright and zesty lemon bars are incredibly versatile. They pair beautifully with a variety of beverages and accompaniments, making them perfect for almost any occasion.
- Coffee or Tea: A classic pairing! The tartness of the lemon bars cuts through the richness of a strong cup of coffee or a comforting mug of hot tea (especially black tea or an herbal blend).
- Fresh Berries: A simple bowl of mixed berries – think raspberries, blueberries, or strawberries – complements the lemon flavor beautifully. The natural sweetness and slight tartness of the berries create a lovely contrast.
- Whipped Cream or Ice Cream: A dollop of homemade whipped cream or a scoop of vanilla bean ice cream adds a creamy, decadent touch. The coolness and richness provide a wonderful counterpoint to the vibrant lemon.
- A Light Lunch: These lemon squares make a delightful dessert after a light lunch. Serve them following a crisp salad, a simple soup, or a fresh sandwich for a balanced and satisfying meal.
- Brunch Spreads: Lemon bars are a star on any brunch buffet. Their bright flavor pairs well with quiches, fruit salads, and other breakfast pastries, adding a touch of elegance.
- Sparkling Wine or Prosecco: For an adult gathering, a chilled glass of sparkling wine or Prosecco elevates the experience. The bubbles and dry notes complement the sweet-tart profile of the lemon bars perfectly.
- Iced Tea or Lemonade: Keep the citrus theme going with a refreshing glass of iced tea or, for a double dose of lemon, a cold glass of homemade lemonade.
These bright and zesty lemon bars are incredibly versatile and can be enjoyed with various beverages. Enhance your meal by pairing them with our Creamy Lemon Ricotta Pasta: An Incredible Ultimate Recipe, which complements the flavors splendidly.
FAQs About Lemon Bars
Can I make these Lemon Bars ahead of time?
Absolutely! Lemon bars are an excellent make-ahead dessert. You can bake them, cool them completely, and then store them in the refrigerator for up to 5-7 days before serving. In fact, many people find the flavor and texture improve after a day or two in the fridge, as the flavors meld together beautifully.
Why did my Lemon Bar filling crack?
Several factors can cause your lemon bar filling to crack. The most common reason is overbaking. When the filling bakes for too long, it can dry out and shrink, causing cracks as it cools.
Another reason could be rapid cooling; going from a hot oven directly to a very cold environment can shock the filling. Always let the bars cool slowly on a wire rack at room temperature before chilling in the refrigerator.
What’s the best way to cut Lemon Bars cleanly?
For pristine cuts, ensure your lemon bars are thoroughly chilled, ideally for at least 2 hours or even overnight. Use a long, sharp chef’s knife. For the cleanest lines, wipe the blade clean with a damp cloth after each cut to remove any sticky residue. You can also lightly run the knife under hot water, dry it, and then cut, repeating for each slice.
Can I use bottled lemon juice for Lemon Bars?
While you technically *can* use bottled lemon juice, I strongly recommend using fresh lemon juice for these lemon bars. Bottled juice often contains preservatives and lacks the bright, vibrant, and nuanced flavor of freshly squeezed lemons. The zest from fresh lemons also adds a significant amount of essential lemon oil, boosting the overall taste profile in a way bottled juice simply cannot replicate. Fresh is best for this recipe!
Are Lemon Bars gluten-free or dairy-free?
This particular traditional recipe for lemon bars contains both gluten (from the all-purpose flour in the crust and filling) and dairy (from the butter in the crust). However, you can easily adapt this recipe to be gluten-free by substituting a 1:1 gluten-free all-purpose flour blend. For a dairy-free version, use a high-quality plant-based butter substitute in the crust. The filling itself is naturally dairy-free.
How do I know when my Lemon Bars are done baking?
You’ll know your lemon bars are done when the edges of the filling appear set and lightly golden, and the center has only a slight jiggle, like a very loose Jell-O. If the center is still very liquid or sloshy, it needs more time. Be careful not to overbake, as this can lead to a dry, rubbery, or cracked filling. The filling will continue to firm up as it cools and chills.
Print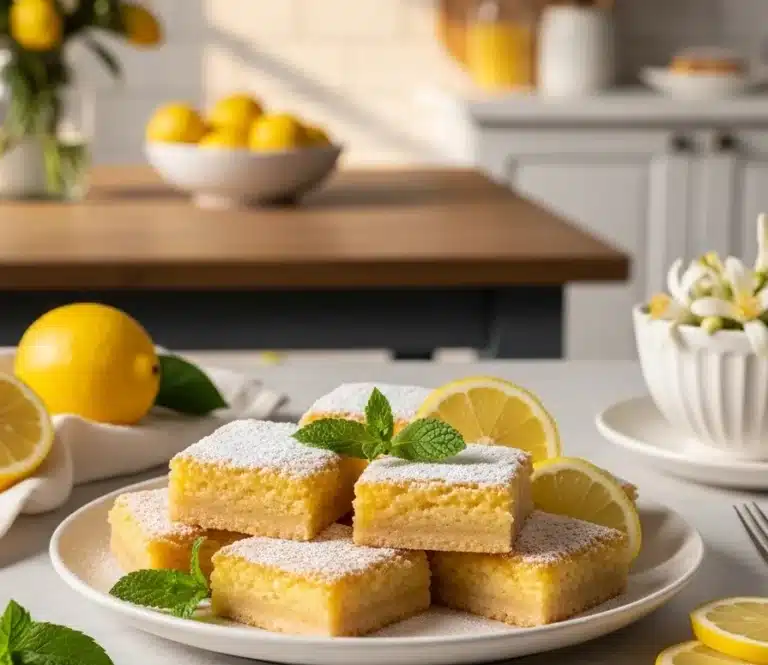
Lemon Bars
These homemade lemon bars are a delightful dessert that balances the perfect amount of sweetness and tartness, creating a ray of sunshine in every bite. Easy to make and ideal for any occasion, they are loved by kids and adults alike.
- Total Time: 1 hrs 5 mins
- Yield: 16 servings 1x
Ingredients
2 cups All-purpose flour
1/2 cup Granulated sugar
1/4 teaspoon Salt
1 cup Unsalted butter, cold and cubed
2 cups Granulated sugar
1/4 cup All-purpose flour
4 Large eggs
2/3 cup Fresh lemon juice
2 tablespoons Lemon zest
As needed Powdered sugar (for dusting)
Instructions
- Preheat oven to 350°F (175°C) and line a 9×13-inch baking pan with parchment paper
- In a bowl, whisk together 2 cups flour, 1/2 cup sugar, and 1/4 teaspoon salt. Cut in 1 cup cold butter until mixture resembles coarse crumbs
- Press the mixture firmly into the bottom of the prepared pan and blind bake for 18-20 minutes
- In another bowl, whisk together 2 cups sugar and 1/4 cup flour until combined
- Add 4 eggs, 2/3 cup lemon juice, and 2 tablespoons lemon zest, whisking until smooth
- Pour the lemon filling over the hot crust and bake for an additional 20-25 minutes until the filling is set
- Cool completely at room temperature, then chill in the refrigerator for at least 2 hours before slicing
- Dust with powdered sugar before serving
Notes
Use fresh lemon juice and zest for the best flavor.
Allow the bars to cool completely for clean cutting.
Chill overnight for improved flavor and texture.
- Prep Time: 20 mins
- Cook Time: 45 mins
- Category: Dessert
- Method: Baking
- Cuisine: American
- Diet: Gluten Free Option Available, Dairy Free Option Available
Nutrition
- Serving Size: 1 bar
- Calories: 150 kcal
- Sugar: 15 g
- Sodium: 60 mg
- Fat: 5 g
- Saturated Fat: 3 g
- Unsaturated Fat: 2 g
- Trans Fat: 0 g
- Carbohydrates: 22 g
- Fiber: 0 g
- Protein: 2 g
- Cholesterol: 50 mg
Lemon bars are a classic dessert that features a rich, buttery crust topped with a tangy lemon filling, often finished with a dusting of powdered sugar. These delightful treats are celebrated in many cultures and can be found in various adaptations, making them a beloved choice for sweet lovers everywhere, including this zesty recipe.
