
Oh, the quest for the perfect crispy chicken! It feels like a journey every mom embarks on sooner or later. I remember vividly those early days in the kitchen with my three little ones, all clamoring for “crunchy chicken!” I tried everything – different breadings, various cooking methods, even some culinary acrobatics that left my kitchen looking like a flour bomb went off.
My sweethearts, bless their hearts, would often pick off the soggy coating, leaving behind perfectly cooked but terribly un-crispy chicken. It was a disheartening sight!
I yearned for that golden-brown, crackling crust, the kind that whispers “eat me!” before you even take a bite. I spent countless hours experimenting, often wondering, “What Makes Chicken Crispier Flour or Cornstarch?” Is it a secret technique? A magical ingredient?
Or just a lucky guess? For years, I cycled through different recipes, trying to achieve that elusive, satisfying crunch. Finally, after many trials (and a few delicious errors), I cracked the code.
I discovered the simple, yet profound, secrets to truly crispy chicken that my family devours every single time. And today, dear friend, I am absolutely thrilled to share this ultimate recipe with you. Get ready to banish soggy chicken from your life forever!
Why You’ll Love This Recipe
You are going to absolutely adore this crispy chicken recipe, especially if you have ever asked yourself, “What Makes Chicken Crispier Flour or Cornstarch?” First, it delivers an unparalleled crunch, a truly satisfying bite that even the pickiest eaters applaud. Each piece emerges from the pan with a beautiful, golden-brown crust that holds up, staying crispy long after it’s cooked. No more sad, flabby chicken here!
This recipe also focuses on simple, wholesome ingredients, many of which you likely already have in your pantry. We achieve incredible flavor without complicated marinades or exotic spices. It’s nourishing, comforting, and utterly delicious – a true testament to my belief that food is love.
Furthermore, the step-by-step instructions make it approachable for even novice cooks, giving you confidence in the kitchen. Finally, it’s a guaranteed crowd-pleaser, perfect for busy weeknights or a special family meal. Prepare for rave reviews!
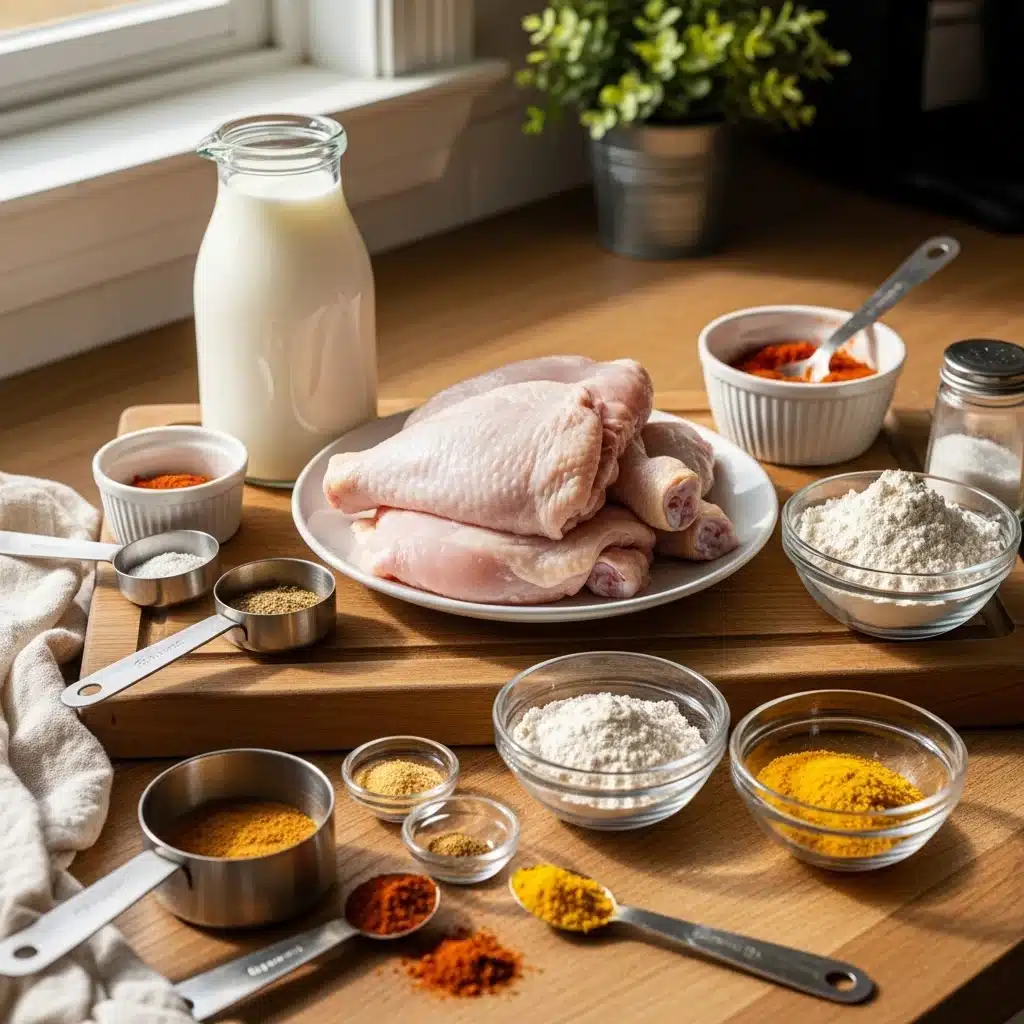
Ingredients You’ll Need
Gather these simple ingredients for the most wonderfully crispy chicken. Each component plays a vital role in achieving that perfect crunch and tender interior.
| Category | Ingredient | Quantity | Notes |
|---|---|---|---|
| Chicken | Bone-in, skin-on chicken pieces | 8 pieces (about 3-4 lbs) | Drumsticks, thighs, or a mix work best. |
| Marinade | Buttermilk | 2 cups | Tenders and seasons the chicken. |
| Marinade | Hot sauce (optional) | 1 tablespoon | Adds a subtle kick and flavor. |
| Dredge | All-purpose flour | 2 cups | Forms the base of our crispy coating. |
| Dredge | Cornstarch | ½ cup | The secret weapon for extra crispiness! |
| Dredge | Smoked paprika | 1 tablespoon | For color and depth of flavor. |
| Dredge | Garlic powder | 1 tablespoon | Essential aromatic flavor. |
| Dredge | Onion powder | 1 teaspoon | Complements the garlic beautifully. |
| Dredge | Salt | 2 teaspoons | Enhances all the flavors. |
| Dredge | Black pepper | 1 teaspoon | Freshly ground for best results. |
| Frying | Vegetable oil or peanut oil | 4-6 cups | Enough to submerge chicken halfway. |
Substitutions & Variations
This crispy chicken recipe is incredibly versatile, allowing you to adapt it to your family’s preferences or dietary needs. Do not hesitate to make it your own!
Chicken Cuts: While bone-in, skin-on pieces offer the most flavor and juiciness, you can certainly use boneless chicken thighs or chicken tenders. Adjust cooking times accordingly; boneless cuts cook faster. Simply ensure they reach an internal temperature of 165°F (74°C). Chicken wings also fry up beautifully with this method.
Gluten-Free Option: Easily make this recipe gluten-free. Substitute the all-purpose flour with a 1:1 gluten-free all-purpose flour blend. Ensure your blend contains xanthan gum for the best texture, or add ¼ teaspoon per cup of flour if it does not. The cornstarch remains an excellent gluten-free crisping agent.
Dairy-Free Buttermilk: If you avoid dairy, create a dairy-free buttermilk substitute. Simply combine 2 cups of your preferred unsweetened non-dairy milk (almond, soy, or oat milk work well) with 2 tablespoons of lemon juice or apple cider vinegar. Let it sit for 5-10 minutes until it slightly curdles.
Use this mixture exactly as you would traditional buttermilk. It still tenderizes the chicken beautifully.
Spice It Up: Elevate the flavor profile with additional spices. Add a pinch of cayenne pepper or a dash of chili powder to the dredge for extra heat. For a smoky kick, increase the smoked paprika.
Incorporate dried herbs like thyme or oregano for an aromatic twist. Experiment with your favorite spice blends!
Herbaceous Notes: Stir 1 tablespoon of dried parsley or 1 teaspoon of dried thyme into your flour mixture. These herbs add a wonderful subtle flavor that complements the chicken perfectly. You can also finish the cooked chicken with fresh chopped parsley or chives for brightness.
Brining Alternative: If you do not have buttermilk, you can brine your chicken in a simple salt solution (about ¼ cup salt per 4 cups water) for 30 minutes to an hour. Pat it very dry before dredging. The buttermilk, however, offers superior tenderization and flavor.
This crispy chicken recipe is incredibly versatile, allowing you to adapt it to your family’s preferences or dietary needs. To explore additional flavors and variations, consider checking out What is Hawaiian Stew at Zippy’s?.
Step-by-Step Instructions
Follow these steps closely to achieve chicken perfection. This method ensures maximum flavor and that irresistible crispy texture.
- Prepare the Chicken: First, thoroughly pat your chicken pieces dry with paper towels. This crucial step removes excess moisture, allowing the dredge to adhere better and promoting a crispier crust. Place the chicken in a large bowl.
- Marinate the Chicken: Pour the buttermilk and hot sauce (if using) over the chicken in the bowl. Ensure all pieces are well coated. Cover the bowl and refrigerate for at least 2 hours, or preferably overnight. The buttermilk tenderizes the chicken and infuses it with flavor, a key step for juicy results.
- Set Up the Dredging Station: In a shallow dish or large Ziploc bag, combine the all-purpose flour, cornstarch, smoked paprika, garlic powder, onion powder, salt, and black pepper. Whisk or shake vigorously to combine these ingredients thoroughly. This forms your flavorful, crisping dredge.
- Heat the Oil: Pour the vegetable or peanut oil into a large, heavy-bottomed pot or Dutch oven. You need enough oil to submerge the chicken pieces halfway. Heat the oil over medium-high heat until it reaches 350°F (175°C). Use a candy or deep-fry thermometer to monitor the temperature; maintaining the correct temperature is vital for crispy, evenly cooked chicken.
- Dredge the Chicken: Remove the chicken from the buttermilk marinade, allowing any excess to drip off. Do not pat it dry. Place one piece of chicken into the flour mixture, ensuring it gets completely coated. Press the dredge firmly onto all surfaces of the chicken. Shake off any excess. For an extra crispy crust, dip the chicken back into the remaining buttermilk marinade briefly, then dredge it a second time in the flour mixture. This double dredge creates a thicker, more robust coating.
- Fry the Chicken: Carefully lower 2-3 pieces of dredged chicken into the hot oil, making sure not to overcrowd the pot. Overcrowding drops the oil temperature too quickly, leading to greasy, soggy chicken. Fry the chicken for 6-8 minutes per side, or until it reaches a deep golden brown color and an internal temperature of 165°F (74°C). Use tongs to carefully turn the chicken.
- Drain and Rest: Once cooked, remove the chicken from the oil and place it on a wire rack set over a baking sheet. This allows excess oil to drain away and prevents the bottom from getting soggy. Season immediately with a sprinkle of extra salt if desired. Repeat with the remaining chicken pieces, allowing the oil to return to 350°F (175°C) between batches.
- Serve: Serve your gloriously crispy chicken hot and enjoy the incredible crunch!
Pro Tips for Success
Achieving truly crispy chicken involves a few key techniques. Master these, and you will consistently turn out perfectly golden, crunchy chicken every time.
Pat That Chicken Dry: Before marinating, always pat your chicken pieces thoroughly dry with paper towels. Excess moisture on the chicken skin creates steam during frying, which prevents the crust from crisping. Dry chicken equals crispier chicken. It is a small step with a big impact.
The Buttermilk Advantage: Marinating in buttermilk not only tenderizes the chicken, resulting in incredibly juicy meat, but it also creates a slightly acidic, textured surface. This rougher surface helps the flour mixture adhere better, giving you a thicker, more substantial crust. Do not skip this step!
The Cornstarch Secret: This is where we truly answer “What Makes Chicken Crispier Flour or Cornstarch?” The combination is key! Cornstarch in your dredge is a game-changer. It absorbs less moisture than flour, which contributes to a crispier texture.
It also creates a lighter, more delicate crust that shatters beautifully, unlike a dense, bready coating. A 4:1 or 3:1 ratio of flour to cornstarch works wonderfully.
Mind the Oil Temperature: Use a thermometer! Maintain your frying oil at a consistent 350°F (175°C). If the oil is too cool, the chicken absorbs too much oil, becoming greasy and soggy.
If it is too hot, the crust burns before the chicken cooks through. Adjust your heat as needed between batches to keep that temperature steady. A heavy-bottomed pot also helps maintain consistent heat.
Do Not Overcrowd the Pot: Resist the urge to fry too many pieces at once. Overcrowding dramatically drops the oil temperature, leading to undercooked, oily, and non-crispy chicken. Fry in batches, giving each piece plenty of space, and allow the oil to return to temperature before adding the next batch.
Double Dredge for Maximum Crunch: For an unbelievably thick, craggy, and super crispy crust, try a double dredge. After the first coat of flour, dip the chicken back into the leftover buttermilk (or a separate small bowl of buttermilk), then coat it in the flour mixture again. This builds up a fantastic texture.
Rest on a Wire Rack: Once you remove the cooked chicken from the oil, immediately place it on a wire rack set over a baking sheet. Never place it directly on paper towels or a flat plate. Air circulates around the chicken on a rack, allowing steam to escape and preventing the bottom from becoming soggy. This keeps your hard-earned crispiness intact.
Season Immediately: A light sprinkle of salt over the hot, freshly fried chicken immediately after it comes out of the oil helps enhance the flavor and adheres beautifully to the crispy crust.
Achieving truly crispy chicken involves a few key techniques. For another unique cooking method that yields delicious results, read up on What Is a Fried Ring-Shaped Breakfast Pastry?.
Storage & Reheating Tips
You can certainly enjoy crispy chicken leftovers, but a little care ensures they remain delicious, not dismal. Learn how to store and reheat properly.
Storage: Allow any leftover chicken to cool completely to room temperature, which prevents condensation and sogginess. Once cool, transfer the chicken to an airtight container. You can store it in the refrigerator for up to 3-4 days.
For longer storage, freeze individual pieces in a single layer on a baking sheet, then transfer them to a freezer-safe bag or container. They will keep for up to 2-3 months.
Reheating in the Oven: This is generally the best method for maintaining crispiness. Preheat your oven to 375°F (190°C). Place the chicken pieces on a wire rack set over a baking sheet.
This ensures air circulates around all sides, promoting even reheating and crisping. Heat for 15-25 minutes, depending on the size of the pieces, until thoroughly heated through and the skin feels crisp again. Turn them once halfway through for best results.
Reheating in an Air Fryer: An air fryer offers another excellent way to revive crispy chicken. Preheat your air fryer to 350°F (175°C). Place the chicken in a single layer in the air fryer basket, ensuring not to overcrowd it.
Cook for 8-12 minutes, flipping halfway, until the chicken is hot and crispy. The air fryer works wonders for restoring that crunch.
Avoid the Microwave: While convenient, the microwave is the enemy of crispy chicken. It heats the chicken unevenly and turns the delicious crunchy coating into a soft, rubbery mess. Save the microwave for other leftovers!
What to Serve With This Recipe
This incredibly crispy chicken stands beautifully on its own, but pairing it with the right sides elevates the meal to a true family feast. I always aim for simple, nourishing accompaniments that complement the rich flavor of the chicken without overpowering it. Here are some of my family’s favorites:
Classic Comfort: Creamy mashed potatoes and a vibrant green vegetable like steamed green beans or roasted asparagus create a timeless pairing. The smooth potatoes offer a lovely contrast to the crunchy chicken. A quick, easy coleslaw also brings a refreshing tang and texture.
Southern Staples: Embrace the full comfort food experience with some homemade biscuits (for soaking up any delicious juices!), rich macaroni and cheese, and a crisp garden salad. These sides are hearty and satisfying, perfect alongside the chicken.
Fresh & Light: For a lighter meal, serve the crispy chicken with a big, leafy green salad tossed with a bright vinaigrette. Roasted seasonal vegetables, like broccoli, carrots, or Brussels sprouts, offer nourishment and color without heavy preparation. A simple corn on the cob or fresh tomato and cucumber salad also works beautifully in warmer months.
Sweet & Tangy: Consider serving a side of homemade honey mustard or a tangy BBQ sauce for dipping. A spoonful of sweet corn relish can also cut through the richness of the fried chicken delightfully.
Beverages: A tall glass of iced tea, a cold lemonade, or even a sparkling water with a squeeze of lemon provides a refreshing counterpoint to the satisfying richness of the chicken. For adults, a light lager or crisp white wine can also pair wonderfully.
This incredibly crispy chicken stands beautifully on its own, but pairing it with the right sides elevates the meal to a true family feast. To complement your meal further, check out What Is the Name of the Italian Breakfast Pastry?.
FAQs
What Makes Chicken Crispier Flour or Cornstarch?
The truth is, both flour and cornstarch contribute to crispy chicken, but they do it in different ways, and the combination truly offers the best results. Flour provides the base and structure for the breading, creating a classic, substantial crust. Cornstarch, however, contains less protein and more amylose than flour.
This composition means it fries up incredibly light, crispy, and shatteringly crunchy. It absorbs less moisture during frying, preventing a dense, bready crust and promoting a delicate, enduring crispiness. So, while flour gives you the coating, cornstarch provides that extra, irresistible crunch, making a blend superior to either on its own.
Can I use boneless chicken for this recipe?
Absolutely! You can easily adapt this recipe for boneless chicken pieces like thighs or tenders. Adjust your cooking times accordingly.
Boneless thighs generally cook in 8-12 minutes, while tenders might only need 5-7 minutes. Always ensure they reach an internal temperature of 165°F (74°C). Keep an eye on them to prevent overcooking, which can dry out the chicken.
What kind of oil is best for frying?
For deep frying, choose an oil with a high smoke point and a neutral flavor. Vegetable oil, canola oil, and peanut oil are excellent choices. They tolerate high temperatures without breaking down or imparting undesirable flavors to your chicken. Avoid olive oil or butter, as they have lower smoke points and will burn quickly.
How do I know when the chicken is cooked through?
The most reliable way to ensure your chicken is cooked thoroughly and safely is to use an instant-read meat thermometer. Insert the thermometer into the thickest part of the chicken, avoiding the bone. The chicken is safe to eat when it reaches an internal temperature of 165°F (74°C). The crust will also appear deep golden brown and feel firm when touched with tongs.
Can I bake or air fry this chicken instead of deep frying?
Yes, you can certainly bake or air fry this chicken, but understand the crispiness will differ from deep frying. For baking, preheat your oven to 400°F (200°C). Lightly spray the dredged chicken with oil and bake on a wire rack for 30-40 minutes, flipping halfway, until golden and cooked through.
For air frying, preheat to 375°F (190°C), lightly spray the chicken with oil, and cook for 18-25 minutes, flipping halfway, until golden and crispy. While delicious, the texture will be less intensely crunchy than oil-fried chicken.
Why do I need to pat the chicken dry?
Patting the chicken dry is a vital step for achieving a truly crispy crust. Any surface moisture on the chicken skin turns into steam when it hits the hot oil. This steam prevents the breading from adhering properly and hinders the crisping process, resulting in a soggy or uneven crust. Dry chicken allows the dredge to stick better and promotes a superior, uninhibited crunch.
Print
What Makes Chicken Crispier Flour or Cornstarch?
This crispy chicken recipe delivers unparalleled crunch and flavor, perfect for families. Using a simple marinade and a special dredge mix, you'll enjoy a deliciously golden-brown crust that stays crispy long after cooking.
- Total Time: 2 hours 15 mins
- Yield: 8 servings 1x
Ingredients
3–4 lbs Bone-in, skin-on chicken pieces
2 cups Buttermilk
1 tablespoon Hot sauce (optional)
2 cups All-purpose flour
½ cup Cornstarch
1 tablespoon Smoked paprika
1 tablespoon Garlic powder
1 teaspoon Onion powder
2 teaspoons Salt
1 teaspoon Black pepper
4–6 cups Vegetable oil or peanut oil
Instructions
- Pat chicken pieces dry with paper towels
- Marinate chicken in buttermilk and hot sauce for at least 2 hours or overnight
- Set up dredging station with flour, cornstarch, and spices
- Heat oil in a pot to 350°F (175°C)
- Dredge marinated chicken in flour mixture, ensuring even coating
- Carefully fry chicken in hot oil for 6-8 minutes per side until golden brow
- Drain chicken on a wire rack and sprinkle with salt before serving
Notes
For extra crispiness, consider double dredging the chicken.
Ensure the oil temperature is maintained during frying.
- Prep Time: 2 hours
- Cook Time: 15 mins
- Category: Dinner
- Method: Frying
- Cuisine: American
- Diet: Nut-free
Nutrition
- Serving Size: 1 piece
- Calories: 500 kcal
- Sugar: 1 g
- Sodium: 800 mg
- Fat: 30 g
- Saturated Fat: 5 g
- Unsaturated Fat: 20 g
- Trans Fat: 0 g
- Carbohydrates: 30 g
- Fiber: 1 g
- Protein: 30 g
- Cholesterol: 100 mg
When it comes to achieving the perfect crispy texture in chicken, the choice between flour and cornstarch can make all the difference. Both ingredients serve unique purposes in cooking; for a deeper understanding of their properties and uses, see this article on cornstarch.